Thyme is one of the most useful and rewarding herbs to grow at home. Its fragrant leaves enhance countless dishes, attract beneficial insects, and add charm to herb gardens, containers, and windowsills. One of the easiest and most cost-effective ways to multiply thyme plants is by rooting cuttings. Among the various propagation methods available, rooting thyme cuttings in water stands out as a simple, beginner-friendly technique that requires minimal tools and effort. With the right approach, this method can produce healthy new plants quickly and reliably.
Why Propagate Thyme from Cuttings
Propagating thyme from cuttings allows you to create identical copies of a healthy parent plant. Unlike growing thyme from seed, which can be slow and unpredictable, cuttings ensure consistent flavor, growth habit, and aroma. This method is ideal if you already have a thriving thyme plant or access to fresh cuttings from a friend or garden.
Rooting cuttings also rejuvenates older thyme plants. As thyme matures, it can become woody and less productive. Taking cuttings from fresh growth not only gives you new plants but also encourages the parent plant to produce tender shoots.
Understanding the Water Rooting Method
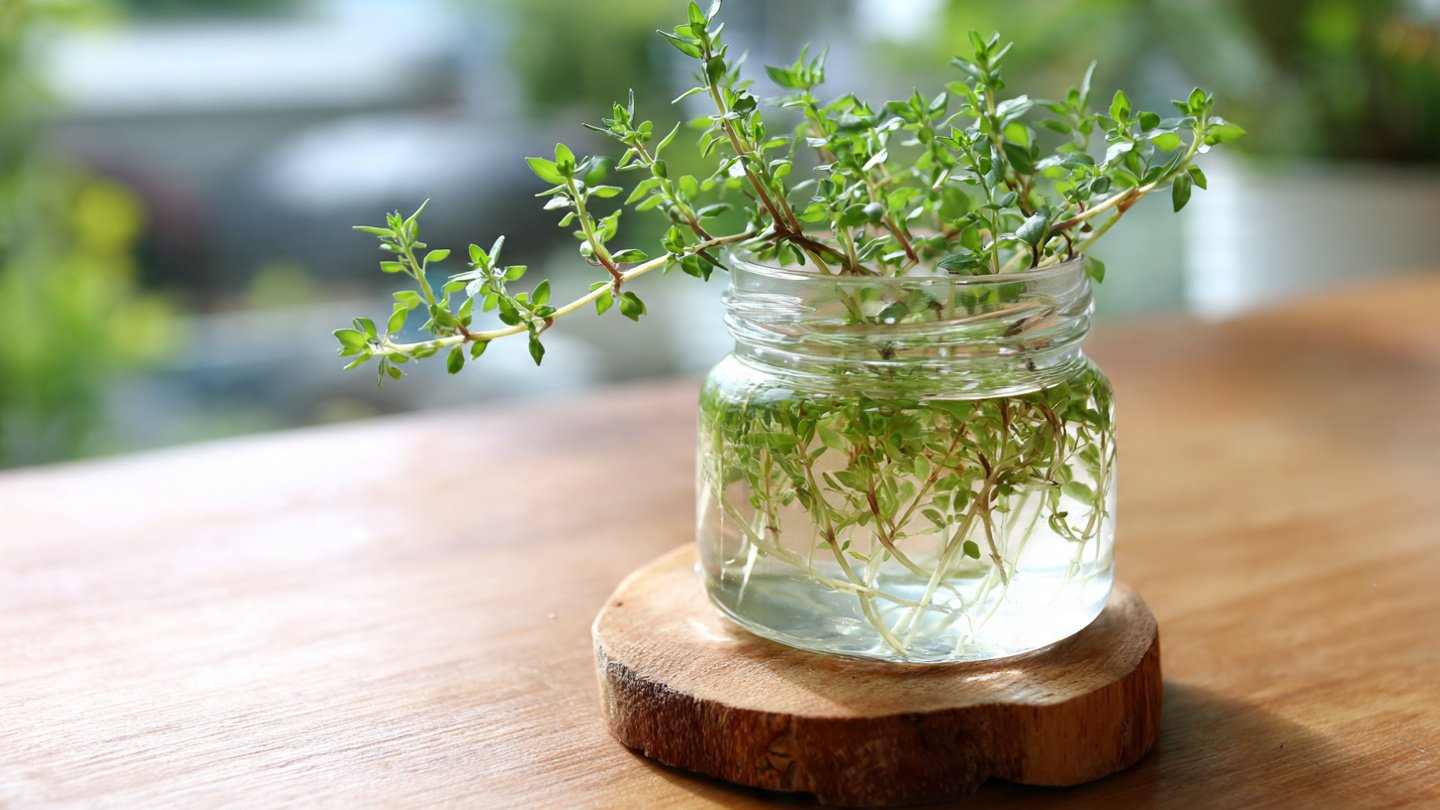
The water method involves placing thyme cuttings in clean water until they develop roots. This technique works well because thyme stems can absorb moisture directly, allowing root cells to form along the submerged nodes. Water rooting provides visibility, letting you monitor root development and adjust conditions easily.
This approach is especially useful for beginners who want a low-risk way to propagate herbs. It eliminates concerns about soil moisture balance and reduces the chance of stem rot when done correctly.
Choosing the Right Thyme Cuttings
Success begins with selecting the right cuttings. Choose healthy thyme stems that are free from pests, disease, or discoloration. Look for soft, green growth rather than woody stems. Younger stems root more easily and quickly.
Each cutting should be about four to six inches long. Use clean, sharp scissors or pruning shears to make a clean cut just below a leaf node. Cutting below a node increases the chance of root formation because nodes contain concentrated growth hormones.
Avoid flowering stems, as flowering diverts energy away from root development. If the plant is flowering, choose stems without buds or pinch off any flowers before placing the cuttings in water.
Preparing the Cuttings Properly
Once the stems are cut, preparation is essential. Remove the leaves from the lower half of each cutting. Leaves submerged in water can rot and promote bacterial growth, which may hinder rooting. Leave a few sets of leaves at the top to allow photosynthesis and continued growth.
Rinse the cuttings gently to remove dust or insects. Clean stems help maintain clear water and reduce the risk of contamination during the rooting process.
Selecting the Right Container and Water
Choose a clean glass jar, cup, or small vase for rooting thyme cuttings. Clear containers are ideal because they allow you to observe root growth without disturbing the cuttings. Make sure the container is thoroughly washed to prevent bacterial buildup.
Fill the container with room-temperature water. Avoid using very cold or hot water, as temperature extremes can stress the cuttings. If possible, use filtered or distilled water, especially if your tap water is heavily chlorinated.
Place the cuttings in the container so that the leafless portion of the stem is submerged, while the leaves remain above the waterline. Ensure that the stems are not overcrowded, as crowding can reduce airflow and increase the risk of rot.
Ideal Placement for Rooting Thyme in Water
Light plays a crucial role in successful rooting. Place the container in a bright location with indirect sunlight. A sunny windowsill with filtered light works well. Avoid direct, intense sunlight, which can overheat the water and stress the cuttings.
Maintain a stable indoor temperature, ideally between sixty-five and seventy-five degrees Fahrenheit. Avoid placing the container near heating vents, air conditioners, or drafty windows, as temperature fluctuations can slow root development.
Changing Water to Encourage Healthy Roots
One of the most important steps in the water rooting method is regular water changes. Change the water every two to three days to keep it fresh and oxygenated. Stagnant water encourages bacteria and algae growth, which can damage the cuttings.
When changing the water, rinse the container and gently rinse the stems if necessary. Fresh water provides oxygen that stimulates root growth and keeps the cuttings healthy throughout the process.
Watching for Root Development
Thyme cuttings usually begin to form roots within one to two weeks, although timing may vary depending on temperature, light, and stem health. You may first notice small white bumps or fine threads emerging from the nodes. These are early root structures.
Allow the roots to grow until they are at least one to two inches long before transplanting. Strong, well-developed roots improve the chances of successful establishment in soil.
During this time, remove any cuttings that show signs of rot, cloudiness, or foul odor. Removing unhealthy stems prevents problems from spreading to the others.
Transplanting Rooted Cuttings into Soil
Once the roots are well developed, it is time to transfer the thyme cuttings into soil. Choose a small pot with drainage holes to prevent waterlogging. Use a light, well-draining potting mix, ideally one designed for herbs or Mediterranean plants.
Moisten the soil slightly before planting. Create a small hole with your finger or a pencil and gently place the rooted cutting into the hole. Firm the soil lightly around the stem to provide support without compacting it.
Water gently after planting to help the soil settle around the roots. Place the newly potted thyme in bright, indirect light for the first few days while it adjusts.
Caring for Newly Transplanted Thyme
After transplanting, keep the soil lightly moist but not soggy. Overwatering is one of the most common mistakes with thyme, as it prefers slightly dry conditions once established. Allow the top inch of soil to dry out between watering sessions.
Gradually introduce the plant to more sunlight over a week or two. Thyme thrives in full sun, but sudden exposure after water rooting can cause stress. Slow acclimation ensures healthy growth and strong stems.
Pinch back the tips once the plant shows new growth. This encourages bushier development and prevents legginess.
Advantages of the Water Method
Rooting thyme cuttings in water offers several benefits. It requires minimal supplies, making it accessible for gardeners of all skill levels. The transparency of the process allows for easy monitoring, increasing success rates.
This method also speeds up propagation. Cuttings often root faster in water than in soil because moisture is consistently available. Additionally, water rooting is a clean, mess-free option for indoor gardening.
Common Mistakes to Avoid
While the water method is simple, a few mistakes can reduce success. Leaving leaves submerged in water can cause rot. Forgetting to change the water regularly leads to bacterial growth. Placing cuttings in direct sunlight may overheat the water and damage stems.
Using woody or flowering stems also slows rooting. Selecting fresh, flexible growth dramatically improves results.
Conclusion
Rooting thyme cuttings using the water method is a simple, reliable trick that makes herb propagation easy and rewarding. By selecting healthy stems, preparing them correctly, providing clean water, and maintaining proper light and temperature, you can produce strong new thyme plants with minimal effort.
This technique is ideal for beginners, home cooks, and gardeners who want to expand their herb collection without buying new plants. With patience and basic care, water-rooted thyme cuttings quickly develop into vigorous plants ready for soil, containers, or garden beds. By mastering this simple method, you ensure a steady supply of fresh thyme while enjoying the satisfaction of growing plants from cuttings successfully.