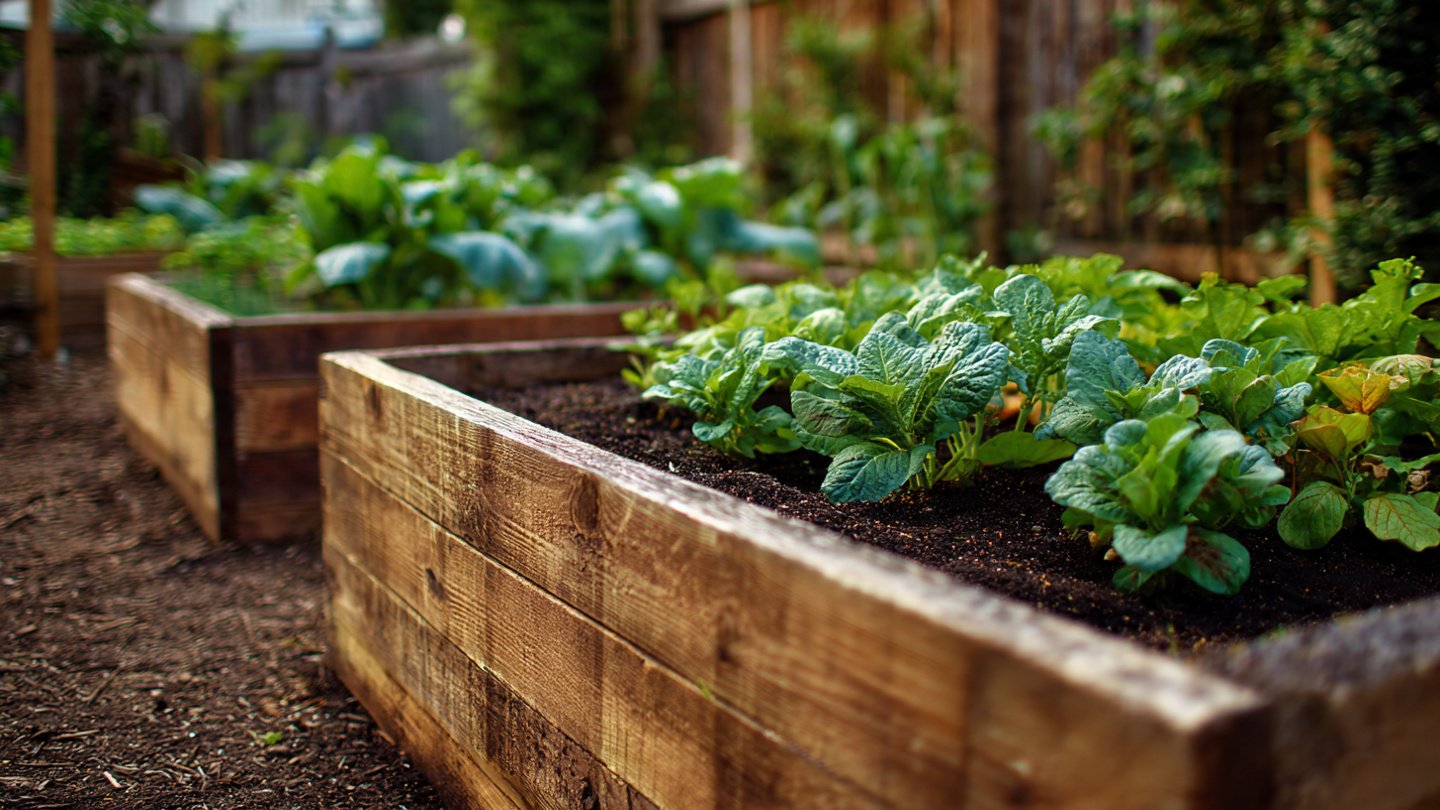
A raised bed garden is one of the most effective ways to increase your vegetable yield, improve soil quality, and make gardening more manageable. Unlike traditional in-ground gardens, raised beds allow for better drainage, soil control, and access, making them ideal for both beginners and experienced gardeners. With proper planning and construction, a raised bed garden can provide bigger, healthier harvests year after year. This guide will walk you through building a raised bed garden step by step, covering design, materials, soil preparation, planting, and maintenance.
Understanding the Benefits of Raised Bed Gardening
Raised bed gardening offers numerous advantages over conventional in-ground gardens:
- Improved Soil Quality: You have full control over the soil composition, enabling optimal fertility and structure for plant growth.
- Better Drainage: Elevated beds prevent waterlogging and root rot, especially in heavy or clay soils.
- Extended Growing Season: Soil in raised beds warms up faster in spring and stays warmer longer in fall.
- Reduced Soil Compaction: Avoid walking on the soil, keeping it loose and aerated for root development.
- Accessibility: Raised beds are easier to reach, making gardening more comfortable for people with mobility issues.
- Pest Control: Elevated beds can reduce weeds, snails, and some garden pests.
Understanding these benefits helps you design a raised bed garden that maximizes productivity and ease of use.
Choosing the Location
Selecting the right location is essential for a successful raised bed garden. Consider the following factors:
- Sunlight: Most vegetables require at least 6–8 hours of direct sunlight per day. Choose a sunny, unobstructed area for your raised beds.
- Level Ground: A flat, even surface ensures proper water distribution and prevents soil erosion.
- Access to Water: Raised beds need regular watering, so situate them near a hose or irrigation system.
- Protection from Wind: Shelter from strong winds helps prevent soil drying and plant damage.
Avoid low areas that collect water, shaded corners, or locations with poor drainage. Proper site selection increases productivity and reduces maintenance.
Planning the Size and Layout
Raised beds come in various shapes and sizes, but certain guidelines make them most efficient:
- Width: 3–4 feet wide is ideal, allowing easy access from both sides without stepping on the soil.
- Length: Varies based on space; common lengths range from 6 to 12 feet.
- Height: 12–24 inches is sufficient for most crops. Taller beds (up to 36 inches) are suitable for deep-rooted plants or improved accessibility.
- Pathways: Leave 2–3 feet between beds for walking and maintenance.
Consider a modular layout with multiple beds for crop rotation, companion planting, and efficient irrigation. Proper planning minimizes wasted space and maximizes harvest potential.
Choosing Materials
Raised beds can be built from a variety of materials. Choose based on budget, durability, and aesthetics:
- Wood: Cedar, redwood, and untreated pine are popular. Cedar is naturally rot-resistant. Avoid pressure-treated lumber due to potential chemical leaching.
- Stone or Brick: Long-lasting, visually appealing, but labor-intensive.
- Concrete Blocks: Durable and versatile; can be stacked to create higher beds.
- Recycled Materials: Old timber, pallets, or metal can be used creatively.
Ensure the material is safe for growing edibles and can withstand outdoor conditions for several years.
Building the Frame
Constructing the raised bed frame is the first physical step. Follow these steps:
- Measure and Cut Materials: Use a tape measure to mark lengths for your chosen dimensions. Cut wood or blocks accordingly.
- Assemble the Frame: For wooden beds, use screws or nails to secure corners. For blocks, stack and level them carefully.
- Check Level: Use a spirit level to ensure even construction, preventing uneven water distribution.
- Reinforce Corners: Add corner posts or braces if needed for larger beds to prevent bowing.
Once the frame is stable, you’re ready to prepare the site and fill it with soil.
Preparing the Site
Before filling the raised bed, prepare the area to promote drainage and prevent weeds:
- Clear Vegetation: Remove grass, weeds, and debris from the bed area.
- Loosen Soil: Lightly till the ground to encourage root growth and drainage.
- Optional Liner: Landscape fabric or cardboard can be placed at the bottom to reduce weeds while allowing drainage. Avoid impermeable liners, which trap water.
Proper preparation reduces future maintenance and improves soil conditions for optimal growth.
Filling the Raised Bed
The key to a productive raised bed is high-quality soil. A good soil mix consists of:
- Topsoil: Forms the base and provides structure.
- Compost: Adds nutrients and improves soil texture.
- Organic Matter: Manure, leaf mold, or coconut coir increases water retention and fertility.
- Aeration Material: Perlite or coarse sand improves drainage in heavier soils.
Mix components thoroughly, and fill the bed to 2–3 inches below the top of the frame. This prevents spillage during watering.
Planting Your Raised Bed
Planting in raised beds is simple and efficient:
- Spacing: Follow recommended spacing for each crop to allow adequate air circulation and root development.
- Companion Planting: Plant compatible crops together to deter pests and improve growth. For example, tomatoes grow well with basil, and carrots benefit from onions.
- Succession Planting: Stagger planting times to maximize harvest and keep the bed producing all season.
- Watering: Water immediately after planting to help seedlings establish.
Raised beds are ideal for intensive planting, enabling higher yields per square foot.
Watering and Irrigation
Consistent moisture is critical in raised beds, which dry out faster than in-ground gardens:
- Manual Watering: Use a watering can or hose with a gentle spray to avoid washing away soil.
- Drip Irrigation: Delivers water directly to the roots, conserving water and reducing foliage disease.
- Mulching: Apply a 2–3 inch layer of mulch to retain moisture, suppress weeds, and regulate soil temperature.
Monitor soil moisture regularly, especially during hot, dry weather, to maintain optimal growing conditions.
Fertilizing and Soil Maintenance
Raised beds allow for easy fertilization and soil management:
- Organic Fertilizers: Compost, worm castings, or liquid seaweed extract provide nutrients without chemicals.
- Balanced Fertilizer: Use a slow-release balanced fertilizer during the growing season to support continuous growth.
- Soil Replenishment: Add compost annually to maintain fertility and improve structure.
Healthy, nutrient-rich soil ensures robust growth and larger harvests.
Pest and Disease Management
Raised beds can reduce some pests but are not immune. Common strategies include:
- Physical Barriers: Use row covers or netting to prevent insect damage.
- Crop Rotation: Avoid planting the same crop in the same bed consecutively to reduce disease buildup.
- Companion Plants: Certain herbs and flowers repel pests naturally.
- Regular Inspection: Check leaves and stems for signs of disease or insect infestation and treat early.
Preventative care reduces crop loss and maintains bed productivity.
Harvesting and Continuous Production
One of the advantages of raised beds is ease of harvest:
- Quick Access: Elevated soil and organized layout make picking vegetables faster and easier.
- Sequential Planting: Continuous planting of fast-growing crops ensures a steady harvest.
- Pruning and Deadheading: Remove old leaves and spent flowers to stimulate new growth and prolong production.
By harvesting efficiently and regularly, you encourage healthy regrowth and maximize yields.
Seasonal Care
Raised beds require attention throughout the year:
- Spring: Prepare soil, plant early crops, and apply compost.
- Summer: Maintain watering, mulch, and fertilization. Protect from heat stress.
- Fall: Harvest remaining crops, add compost, and prepare for winter.
- Winter: Cover beds with mulch or row covers to prevent soil erosion and nutrient loss.
Proper seasonal care ensures that your raised beds remain productive for many years.
Expanding and Improving Raised Beds
As your gardening skills improve, you can expand or enhance your raised beds:
- Vertical Gardening: Add trellises for vining crops like beans and cucumbers.
- Multiple Levels: Stack beds or create tiered arrangements for small spaces.
- Irrigation Upgrades: Install automated drip systems for efficient watering.
- Protective Structures: Use cold frames or hoop houses to extend the growing season.
Continuous improvement ensures that your raised bed garden remains productive, efficient, and rewarding.
Final Thoughts
Building a raised bed garden is an effective way to increase yields, improve soil quality, and make gardening more enjoyable. By choosing the right location, materials, and soil mix, and following proper planting, watering, and fertilization practices, gardeners can achieve bigger, healthier harvests.
Raised bed gardening also allows for creativity in layout, crop selection, and companion planting, making it ideal for beginners and experienced gardeners alike. With consistent care and attention to seasonal needs, a well-built raised bed garden can provide abundant, fresh produce year after year, turning any outdoor space into a productive and beautiful garden.