The sweetsop, also known as Sitaphal, is a tropical fruit celebrated for its sweet, custard-like flesh and nutritional benefits. Growing sweetsop at home can be a rewarding experience, giving you a steady supply of fresh fruit while adding greenery to your garden. With the right guidance, patience, and care, you can grow healthy trees from seeds all the way to fruit-bearing maturity. This guide provides a comprehensive, step-by-step approach to growing sweetsop trees at home.
Why Grow Sweetsop at Home?
Sweetsop is rich in vitamins, minerals, and antioxidants. Its pulp contains vitamin C, potassium, and dietary fiber, making it a healthy addition to your diet. Moreover, growing your own sweetsop offers several advantages:
- Freshness and Quality – Homegrown fruit is often sweeter and juicier than store-bought alternatives.
- Cost-Effective – Avoid high market prices and enjoy fruit directly from your garden.
- Sustainable Gardening – Growing sweetsop promotes biodiversity and reduces reliance on commercially grown produce.
- Decorative Value – The tree has attractive foliage and delicate flowers, enhancing your garden’s aesthetic.
Step 1: Choosing Seeds
Growing a sweetsop tree starts with selecting high-quality seeds. The key considerations include:
- Fruit Selection: Choose seeds from ripe, healthy, and flavorful fruits.
- Seed Viability: Fresh seeds germinate faster than older ones. Ideally, plant within one week of extraction.
- Variety Selection: There are several varieties, including the common Annona squamosa and hybrid cultivars, which can influence sweetness and yield.
Tip: Avoid using seeds from overripe or damaged fruits, as they may not germinate properly.
Step 2: Preparing Seeds for Planting
Before planting, seeds need proper preparation:
- Cleaning: Remove all fruit pulp from the seeds. Residual pulp can cause fungal growth.
- Soaking: Soak the seeds in water for 24–48 hours. This softens the hard seed coat and speeds up germination.
- Optional Scarification: Lightly nick the seed coat with a file or sandpaper to improve water absorption.
Step 3: Germination Process
Germinating sweetsop seeds requires the right soil, temperature, and moisture conditions:
- Soil Mix: Use a well-draining mixture of garden soil, sand, and compost in equal parts.
- Planting Depth: Sow seeds about 1–2 cm deep.
- Watering: Keep the soil moist but not waterlogged. Overwatering can rot seeds.
- Temperature: Seeds germinate best at 25–30°C (77–86°F). Using a greenhouse or warm indoor area can help.
Germination usually takes 3–4 weeks, though some seeds may take up to 6 weeks. Once seedlings develop two or three true leaves, they are ready for transplanting.
Step 4: Transplanting Seedlings
Once your seedlings are robust, transplant them into larger pots or directly into your garden:
- Potting: Use a large container with drainage holes. Add a mixture of loamy soil and compost.
- Spacing: If planting in the garden, maintain at least 3–5 meters between trees to allow proper growth and airflow.
- Hardening Off: Gradually expose seedlings to outdoor conditions for 7–10 days to prevent transplant shock.
Step 5: Ideal Growing Conditions
Sweetsop trees thrive under specific conditions:
- Sunlight: They require full sun for 6–8 hours daily.
- Temperature: Tropical to subtropical climates are ideal. Avoid frost, which can damage young trees.
- Soil: Well-draining, slightly acidic to neutral soils (pH 6–7) are preferred.
- Watering: Water young trees regularly. Mature trees are drought-tolerant but will yield better with moderate irrigation.
Tip: Mulching around the base retains soil moisture and reduces weed growth.
Step 6: Fertilization
Proper nutrition ensures healthy growth and fruit production. Fertilize your sweetsop tree as follows:
- Young Trees: Apply a balanced fertilizer (NPK 10:10:10) every 2–3 months.
- Mature Trees: Use compost or well-rotted manure along with NPK fertilizer to support flowering and fruiting.
- Micronutrients: Sweetsop benefits from magnesium, zinc, and boron, which improve flower quality and fruit set.
Avoid over-fertilization, as excessive nitrogen promotes leaf growth over flowering.
Step 7: Pruning and Training
Pruning keeps the tree healthy and productive:
- Shaping: Trim young trees to develop a strong central trunk and well-spaced branches.
- Removing Dead Branches: Cut diseased, dead, or overcrowded branches to improve airflow and reduce pest risk.
- Timing: Prune immediately after harvest or during dormant periods.
Regular pruning encourages sunlight penetration and improves fruit quality.
Step 8: Pollination
Sweetsop flowers are naturally pollinated by insects, primarily beetles. However, hand pollination can increase fruit set:
- Collect Pollen: Using a soft brush, collect pollen from the stamens of male flowers.
- Transfer Pollen: Gently brush it onto the stigma of female flowers.
- Timing: Perform this early in the morning when flowers are open and receptive.
Hand pollination is especially useful in indoor or urban gardening where natural pollinators are limited.
Step 9: Pest and Disease Management
Common pests and diseases include:
- Pests: Fruit borers, mealybugs, and aphids.
- Diseases: Powdery mildew, leaf spot, and root rot.
Control Measures:
- Use neem oil or insecticidal soap for pest control.
- Ensure proper spacing and ventilation to reduce fungal infections.
- Remove affected leaves or fruits promptly.
- Avoid overwatering to prevent root rot.
Step 10: Flowering and Fruiting
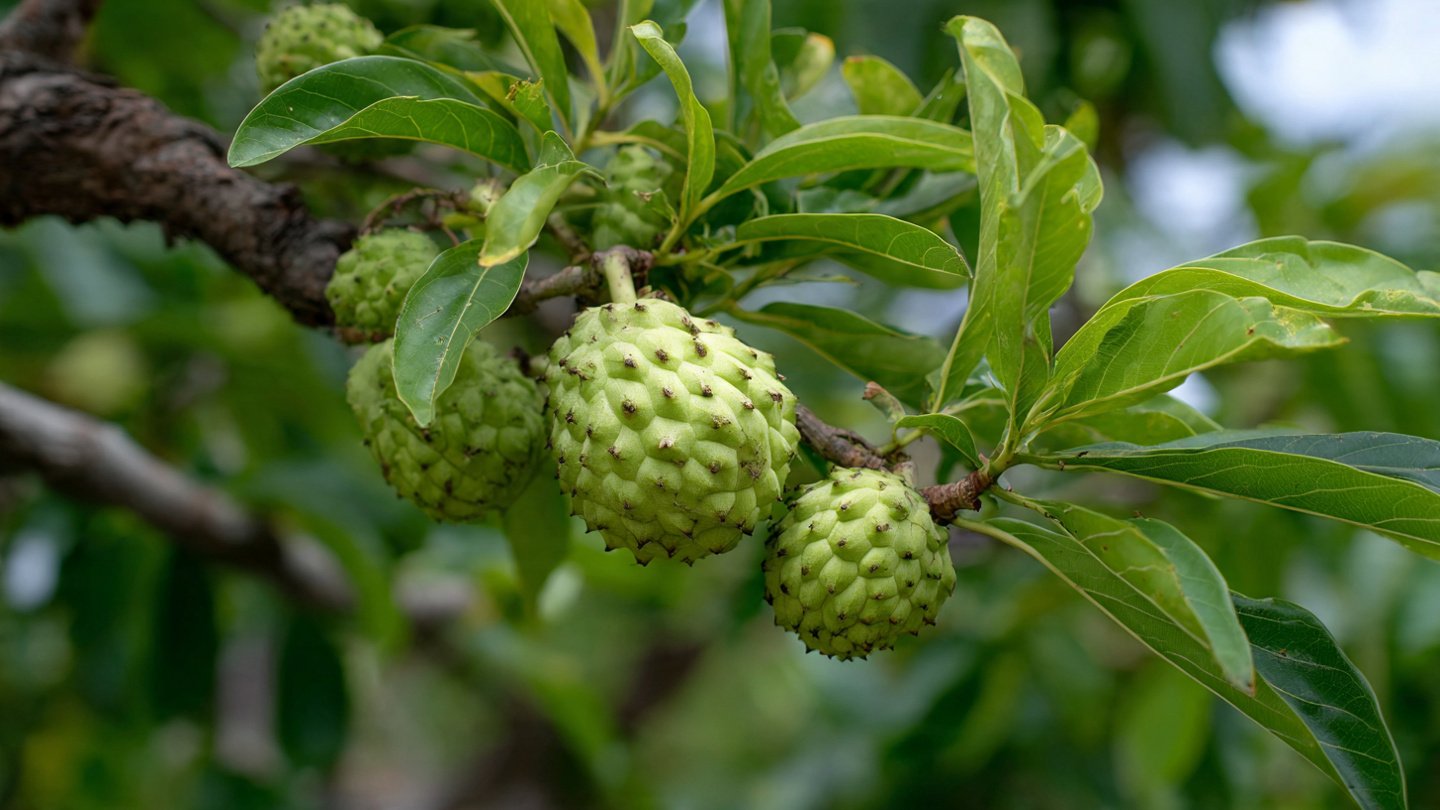
Sweetsop trees typically begin flowering within 2–3 years from seed. The small, greenish-yellow flowers develop into fruits over 3–4 months. Mature fruits are green with knobby skin and soft, sweet pulp. Key tips for better yield:
- Thinning Fruits: If many fruits set, thin some to improve size and quality of remaining fruits.
- Regular Harvest: Harvest fruits when they start softening and develop a pleasant aroma. Avoid leaving overripe fruits on the tree.
Step 11: Harvesting
Harvesting sweetsop is straightforward:
- Timing: The fruit is ready when it changes from dark green to a lighter shade and yields slightly to pressure.
- Method: Use a sharp knife or hand pruners to cut the fruit with a short stem attached.
- Storage: Sweetsop is highly perishable. Keep it in the refrigerator for 2–3 days or consume fresh.
Tip: Avoid dropping fruits, as bruising can lead to rapid spoilage.
Step 12: Propagation for Future Trees
Once you have a healthy sweetsop tree, you can propagate additional trees using:
- Seeds: Easiest method; follow the same germination steps.
- Air Layering: Produces clones of the parent tree and bears fruit faster.
- Grafting: Useful for preserving specific varieties with superior fruit quality.
By propagating trees, you can expand your home orchard and share plants with friends and family.
Conclusion
Growing sweetsop (Sitaphal) at home is a fulfilling journey that combines patience, care, and a love for gardening. From selecting quality seeds to nurturing seedlings, ensuring optimal growth conditions, managing pests, and harvesting sweet, creamy fruits, every step is crucial for success. With consistent effort and attention to detail, even a small backyard can yield delicious sweetsop fruits, providing both nutritional benefits and the joy of cultivating your own tropical fruit tree.
Whether you are an experienced gardener or a beginner, following this step-by-step guide will give you the confidence to grow healthy, productive sweetsop trees at home. Soon, you will enjoy the unique taste of fresh Sitaphal, straight from your garden.