Potatoes are one of the most versatile and satisfying vegetables to grow at home. They are delicious, nutritious, and incredibly rewarding for gardeners of all skill levels. But what if you don’t have a large backyard or a traditional garden plot? The solution is simple: container potato growing. This method allows anyone to grow big, healthy potatoes with high yields using basic containers and minimal space. This guide walks you through a complete step-by-step process to achieve a bountiful potato harvest at home.
Why Grow Potatoes in Containers?
Container potato growing offers several advantages over traditional in-ground cultivation:
- Space Efficiency: Even a small balcony, patio, or rooftop can produce a surprising number of potatoes.
- Control Over Soil: You can provide the perfect soil mix, improving yield and reducing disease risk.
- Mobility: Containers can be moved to optimize sunlight, protect from harsh weather, or rotate crops.
- Less Weeding: Growing potatoes in a container significantly reduces weed competition, making maintenance easier.
- Accessibility: Container gardening allows easy access to harvest without bending or digging deep beds.
By mastering the container method, even beginner gardeners can enjoy high-quality, nutrient-rich potatoes with minimal effort.
Choosing the Right Containers
Selecting the right container is crucial for growing big tubers and maximizing yield. Almost any large container with good drainage can work, but here are some tips:
- Size Matters: Choose a container at least 15–20 inches deep. The wider and deeper the container, the more space tubers have to grow.
- Material: Plastic, fabric grow bags, wooden barrels, or large pots all work well. Fabric grow bags are particularly effective as they allow air pruning of roots and prevent waterlogging.
- Drainage: Ensure your container has adequate holes at the bottom to prevent water stagnation, which can lead to rot.
Larger containers may produce bigger tubers and higher yields, but even moderate-sized containers can provide enough potatoes for a small family.
Selecting Seed Potatoes
The next step is choosing the right seed potatoes. Unlike supermarket potatoes, which may be treated to prevent sprouting, seed potatoes are specifically meant for planting.
- Variety Selection: Choose varieties suited to your climate and taste preferences. Popular choices include Yukon Gold for creamy texture, Russet for baking, and Red Pontiac for salads.
- Quality: Select firm, disease-free potatoes with visible eyes (sprouts). Avoid shriveled or damaged tubers.
- Cutting Tubers: If your seed potatoes are large, cut them into pieces weighing 1–2 ounces, ensuring each piece has at least one or two eyes. Let the cut pieces dry for 24–48 hours to form a protective callus, which reduces the risk of rot.
Preparing the Soil Mix
Potatoes thrive in loose, well-draining soil rich in organic matter. A proper soil mix encourages healthy tuber development.
- Ingredients: Combine equal parts of garden soil, compost, and coarse sand or perlite. Compost provides essential nutrients, while sand or perlite improves drainage.
- pH Level: Aim for a slightly acidic soil with a pH between 5.0 and 6.5. This prevents common potato diseases like scab.
- Filling the Container: Start by adding 4–6 inches of the prepared soil mix to the bottom of your container.
The goal is to create a deep, loose environment that allows tubers to expand freely, resulting in larger potatoes.
Planting Your Potatoes
Once the container and soil are ready, it’s time to plant the seed potatoes.
- Placement: Place the seed potato pieces cut side down, eyes facing up, about 6 inches apart.
- Covering: Cover them with 3–4 inches of soil mix. As the plant grows, you will gradually add more soil to encourage tuber formation—a process called “hilling.”
- Spacing: Avoid overcrowding; each potato plant needs enough space to develop multiple tubers.
Container planting is flexible—you can plant multiple layers if your container is deep enough, layering soil and seed potatoes alternately to maximize yield.
Watering and Sunlight Requirements
Potatoes require consistent moisture but dislike soggy soil. Proper watering ensures healthy tubers and prevents rot.
- Watering: Water thoroughly after planting and keep the soil evenly moist. Containers dry out faster than garden beds, so check daily during hot weather.
- Sunlight: Potatoes need at least 6–8 hours of direct sunlight daily. Position containers in a sunny spot or rotate them to capture maximum light.
Avoid overhead watering during hot, sunny periods as wet foliage can encourage fungal diseases. Drip irrigation or bottom watering works best for container potatoes.
Fertilizing for Bigger Tubers
To achieve big tubers and high yields, feeding your plants is essential.
- Balanced Fertilizer: Apply a balanced, slow-release fertilizer at planting time, or mix well-rotted compost into the soil.
- Side Dressing: Once the plants are 6–8 inches tall, add additional compost or organic fertilizer along the sides. This encourages vigorous growth and increases tuber size.
- Avoid Excess Nitrogen: Too much nitrogen promotes leafy growth at the expense of tubers. Focus on fertilizers rich in phosphorus and potassium for strong root development.
Regular feeding, combined with proper hilling, results in larger, healthier potatoes.
Hilling: The Secret to High Yields
Hilling is the process of adding soil around the base of growing potato plants. This simple technique prevents tubers from being exposed to sunlight, which turns them green and toxic, and encourages more tubers to develop.
- First Hilling: When plants reach 6 inches, add 3–4 inches of soil around the stems.
- Subsequent Hillings: Repeat every few weeks as plants grow, leaving the top leaves exposed.
- Maximum Depth: You can layer up to 12–15 inches of soil in deep containers, allowing multiple layers of tubers.
Hilling is crucial for container potatoes, as it maximizes both tuber size and total yield in a limited space.
Pest and Disease Management
Containers reduce exposure to pests, but vigilance is still necessary. Common issues include aphids, potato beetles, and fungal diseases.
- Physical Barriers: Use row covers or netting to protect plants from insects.
- Organic Controls: Neem oil, insecticidal soap, or introducing beneficial insects can help manage infestations.
- Good Hygiene: Remove any yellowing or diseased foliage immediately and avoid waterlogging to prevent fungal problems.
By maintaining healthy plants and clean containers, you can enjoy a stress-free, productive harvest.
Harvesting Your Potatoes
Timing the harvest depends on whether you want new potatoes or fully mature tubers.
- New Potatoes: Harvest small, tender tubers 2–3 weeks after the plants flower.
- Mature Potatoes: Wait until the foliage turns yellow and dies back, usually 10–12 weeks for early varieties and 14–16 weeks for late varieties.
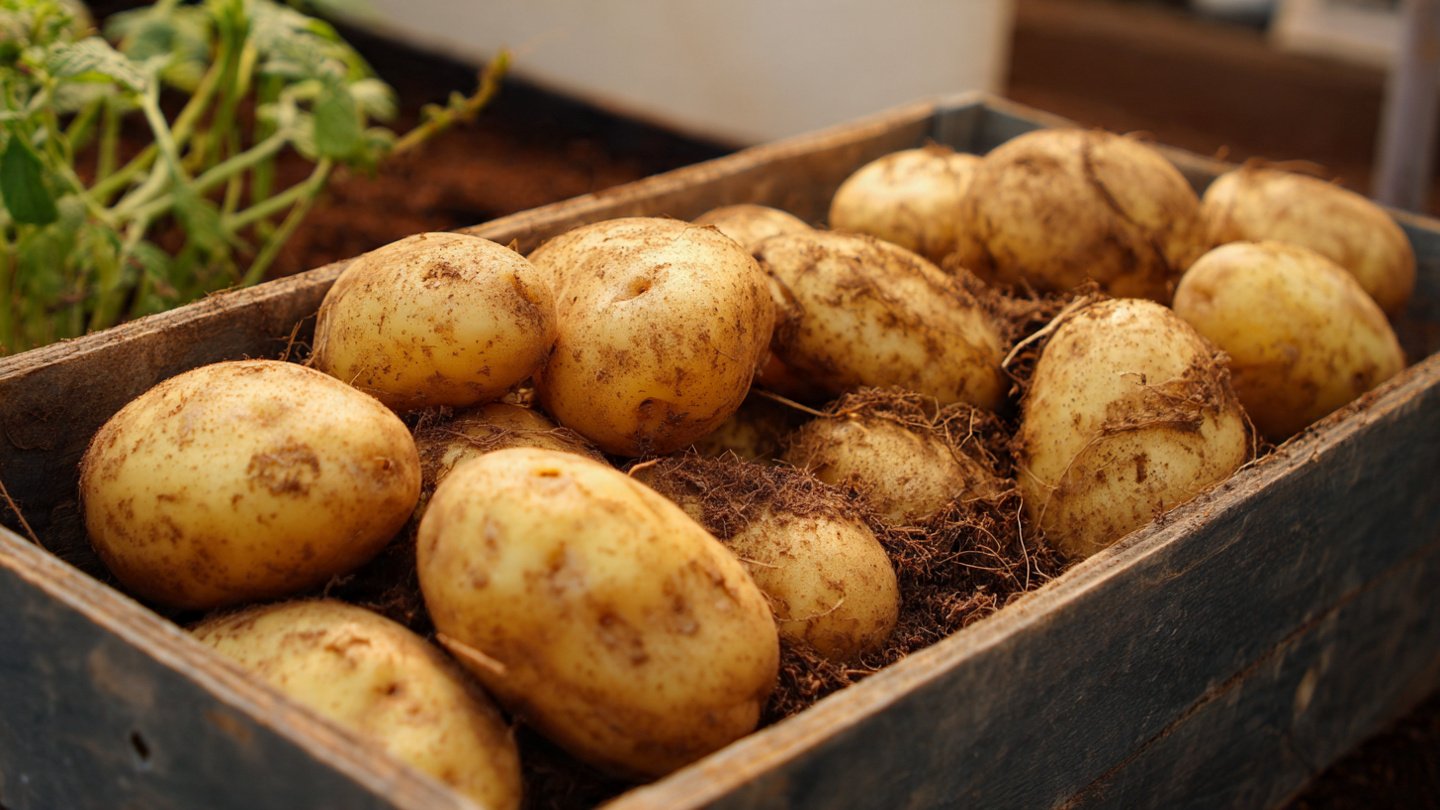
- Harvesting Technique: Empty the container and gently dig through the soil to collect tubers. Avoid cutting or bruising them to ensure longer storage life.
After harvesting, let the potatoes dry for a few hours in a cool, dark place before storing them in a cool, ventilated area.
Storing Your Potatoes
Proper storage extends the shelf life of your homegrown potatoes.
- Temperature: Store potatoes at 45–50°F (7–10°C) to prevent sprouting.
- Light Protection: Keep them in darkness to avoid greening and solanine formation.
- Air Circulation: Use baskets, mesh bags, or wooden crates to allow airflow and reduce rot.
Well-stored potatoes can last for several months, providing a consistent supply of homegrown produce.
Advantages of Container Potato Gardening
Growing potatoes in containers offers numerous benefits:
- High Yield in Small Space: Maximizes productivity even in limited areas.
- Bigger Tubers: Proper hilling and feeding encourage large, healthy potatoes.
- Reduced Labor: Minimal weeding, easy watering, and simple harvesting make it suitable for “lazy gardeners.”
- Pest and Disease Control: Containers limit exposure to soil-borne pathogens and pests.
- Seasonal Flexibility: Containers can be moved indoors or to protected areas to extend the growing season.
By combining container gardening techniques with proper care, anyone can enjoy a plentiful potato harvest with little hassle.
Conclusion
Container potato growing is a practical, space-saving method that yields big, healthy tubers without requiring a traditional garden. By choosing the right containers, selecting quality seed potatoes, preparing nutrient-rich soil, and applying techniques like hilling, watering, and fertilizing, gardeners can achieve high yields with minimal effort. Container potatoes are perfect for small spaces, beginner gardeners, or anyone looking for a low-maintenance, rewarding crop.
With patience, attention, and the simple methods outlined in this guide, you can enjoy the satisfaction of harvesting homegrown potatoes, packed with flavor and nutrients, straight from your container garden. Whether for a small family or personal enjoyment, container potatoes prove that even limited space can yield abundant results.