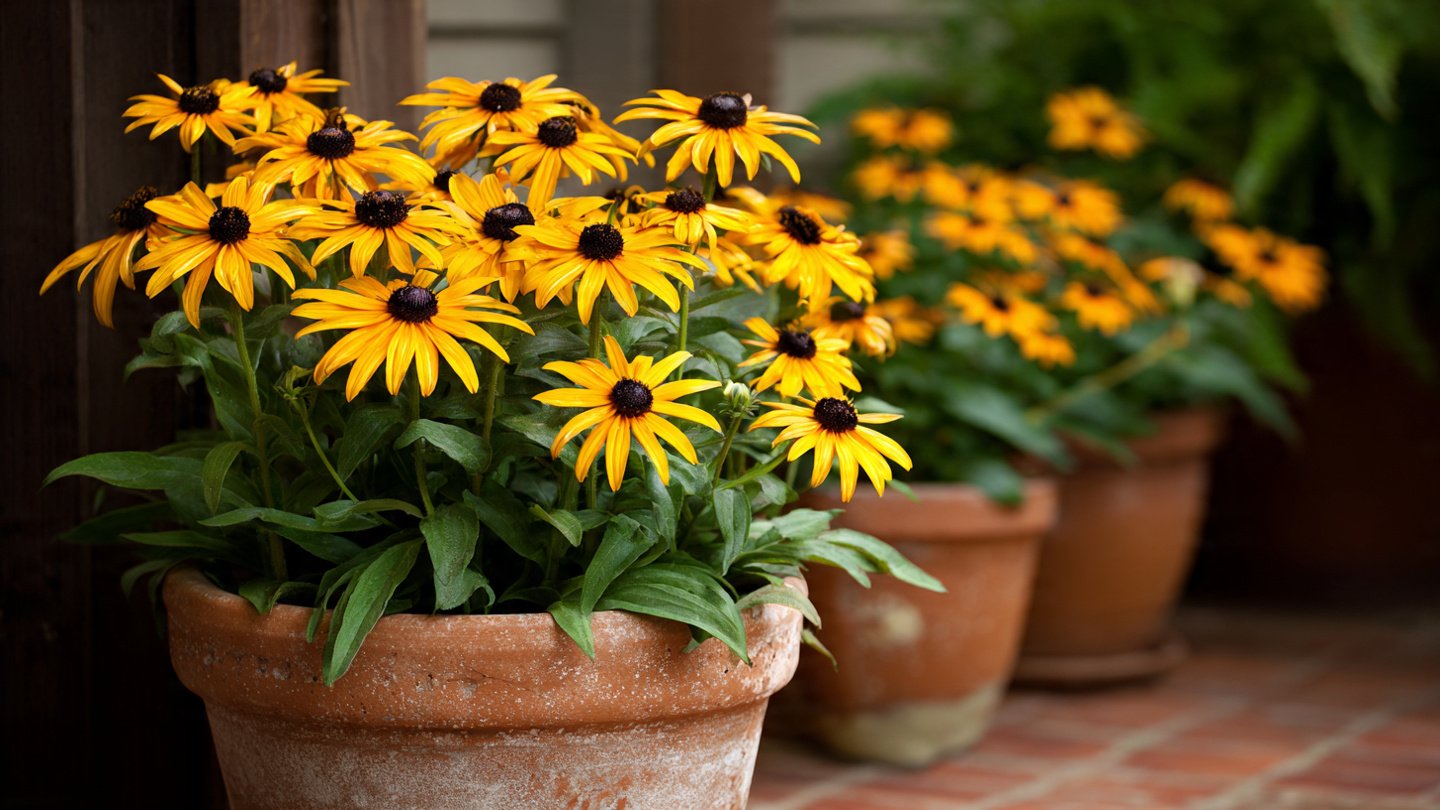
Black-eyed Susans (Rudbeckia hirta) are one of the most beloved wildflowers in North America, celebrated for their bright yellow petals and dark brown centers. They are hardy, cheerful, and attract pollinators such as bees and butterflies, making them a popular choice for gardens and landscapes. But what if you don’t have a garden bed? Can you successfully grow Black-eyed Susans in pots? The answer is a resounding yes—provided you follow the right methods. In this guide, we’ll explore everything you need to know to cultivate healthy, vibrant Black-eyed Susans in containers, including soil, watering, sunlight, and care tips.
Why Grow Black-Eyed Susans in Pots?
Growing Black-eyed Susans in pots is a practical choice for many gardeners. Here’s why:
- Space-Saving: If you live in an apartment, townhouse, or urban environment with limited garden space, containers allow you to enjoy these vibrant flowers on patios, balconies, or windowsills.
- Mobility: Potted plants can be moved to protect them from harsh weather, intense sun, or frost.
- Soil Control: Container gardening allows you to tailor the soil composition, ensuring optimal drainage and fertility.
- Aesthetic Appeal: Pots can act as decorative elements, complementing the bright yellow flowers and creating eye-catching displays.
- Pest and Disease Management: Growing in pots can help isolate plants from soil-borne pests and diseases common in garden beds.
Choosing the Right Container
The container you select plays a critical role in the success of your potted Black-eyed Susans. Consider the following:
- Size: Black-eyed Susans have relatively shallow root systems, but they still need room to grow. A pot at least 12 inches deep and wide is recommended for a single plant. For multiple plants, choose a larger container to prevent overcrowding.
- Material: Plastic, ceramic, or terracotta pots are all suitable. Terracotta is porous, allowing for better air circulation, but it can dry out faster. Plastic retains moisture longer but may overheat in direct sun.
- Drainage: Ensure the container has adequate drainage holes. Waterlogged soil can lead to root rot and poor flowering.
Using a slightly larger pot than necessary is often better than a small, cramped one because Black-eyed Susans can spread and thrive more effectively with extra root space.
Selecting the Soil
Black-eyed Susans prefer well-draining, moderately fertile soil. While they are tolerant of poor soil, container-grown plants need a potting medium that provides both nutrients and proper drainage. Consider the following soil components:
- Potting Mix: Use a high-quality potting mix as the base. Avoid heavy garden soil, which can compact and restrict roots.
- Compost: Adding organic compost enriches the soil and improves water retention while providing nutrients.
- Perlite or Sand: These additives improve drainage and prevent soil compaction, which is critical in containers.
The ideal soil pH for Black-eyed Susans is slightly acidic to neutral, between 6.0 and 7.0. You can test your potting mix with a home pH kit and adjust accordingly using lime to raise pH or sulfur to lower it.
Choosing the Right Variety
Several varieties of Black-eyed Susans are suitable for container gardening. Popular options include:
- ‘Goldsturm’: Compact, bright yellow blooms, ideal for pots.
- ‘Indian Summer’: Smaller plants with a long blooming period.
- ‘Toto’: Dwarf variety perfect for smaller containers or indoor spaces.
- ‘Little Goldstar’: Compact with continuous flowering.
Selecting a compact or dwarf variety is often best for pots, as these require less root space and are easier to manage.
Planting Black-Eyed Susans in Pots
You can grow Black-eyed Susans from seeds, seedlings, or divisions. Each method has advantages:
1. From Seeds
Growing from seeds allows for more variety selection and is cost-effective:
- Fill the pot with moistened potting mix.
- Scatter seeds lightly on the surface or sow them about ¼ inch deep.
- Cover lightly with soil or vermiculite.
- Keep the soil consistently moist until germination.
- Provide bright, indirect light or place the pot in a sunny window.
Germination usually takes 7–14 days. Once seedlings have 2–3 sets of true leaves, thin them to one plant per pot.
2. From Seedlings
Purchasing young Black-eyed Susan plants from nurseries or garden centers is faster:
- Fill the pot with well-draining soil.
- Remove the seedling carefully from its nursery container.
- Plant at the same depth as it was in its original container.
- Water thoroughly to help roots establish.
3. From Divisions
Mature Black-eyed Susans can be divided in spring or fall:
- Carefully lift the plant from its container or garden bed.
- Separate the root clumps into smaller sections, ensuring each division has healthy roots.
- Replant each division into individual pots with fresh soil.
- Water gently and provide bright, indirect light until the plants establish.
Sunlight Requirements
Black-eyed Susans thrive in full sun, which means at least 6–8 hours of direct sunlight daily. Containers can be moved to ensure they receive adequate light, especially in shaded yards or urban environments.
- Indoor Growing: Place the pot on a south-facing windowsill or use supplemental grow lights for 12–14 hours per day.
- Outdoor Growing: Ensure pots are positioned where they receive morning or afternoon sun, avoiding excessive afternoon heat in extremely hot regions.
Proper sunlight is essential not only for vibrant foliage but also for continuous flowering. Insufficient light results in tall, leggy plants with fewer blooms.
Watering Black-Eyed Susans in Pots
Containers dry out faster than garden beds, so consistent watering is essential:
- Frequency: Water when the top inch of soil feels dry. In hot weather, this may mean daily watering.
- Method: Water thoroughly until excess drains from the bottom. Avoid overwatering, which can lead to root rot.
- Mulching: Adding a layer of organic mulch on top of the soil can help retain moisture and regulate soil temperature.
Maintaining a balance is crucial—too little water stresses the plant, while too much promotes fungal diseases.
Fertilizing Potted Black-Eyed Susans
Container-grown plants rely on supplemental nutrients because soil nutrients deplete faster in pots:
- Use a balanced, slow-release fertilizer in spring and mid-summer.
- Alternatively, a water-soluble fertilizer can be applied every 4–6 weeks during the growing season.
- Avoid excessive nitrogen, which encourages leafy growth at the expense of blooms.
Supporting Flower Growth
Black-eyed Susans are generally low-maintenance, but container plants may need additional support for prolonged blooming:
- Deadheading: Remove spent flowers to encourage new blooms.
- Pinching: Lightly pinch back leggy stems to promote bushier growth.
- Monitoring Pests: Aphids, spider mites, and powdery mildew can affect flowering. Treat infestations early with insecticidal soap or neem oil.
Winter Care
In colder climates, container-grown Black-eyed Susans can be moved indoors during winter:
- Place pots in a bright, cool room with temperatures above 40°F.
- Reduce watering to prevent root rot, as growth slows during dormancy.
- Resume regular watering and sunlight exposure in spring to encourage new growth and flowering.
Advantages of the Pot Method
Growing Black-eyed Susans in pots offers multiple advantages over garden planting:
- Flexibility: You can rearrange pots for aesthetic appeal or optimal sunlight.
- Extended Blooming: Potted plants tend to flower longer if they are well-maintained.
- Accessibility: Plants can be easily monitored for pests, disease, or nutrient deficiencies.
- Urban Gardening: Even without a yard, you can enjoy vibrant flowers and attract pollinators to balconies or patios.
Conclusion
Growing Black-eyed Susans in pots is both feasible and rewarding. These hardy, cheerful flowers adapt well to container life when provided with the proper soil, adequate sunlight, regular watering, and occasional fertilization. Whether you grow them from seeds, seedlings, or divisions, potted Black-eyed Susans bring bright, golden color and pollinator-friendly blooms to any indoor or outdoor space.
By following the best method—choosing the right container, using well-draining soil, maintaining consistent care, and supporting healthy flowering—you can enjoy a continuous display of these classic wildflowers. Container gardening also offers the flexibility to move plants, protect them from harsh weather, and enjoy their beauty year-round.
For gardeners with limited space or anyone who loves vibrant, low-maintenance flowers, trying the pot method for Black-eyed Susans is a simple, effective way to enjoy fresh blooms and a splash of golden cheer wherever you like. With attention to sunlight, watering, and care, your potted Black-eyed Susans will flourish, bringing beauty, color, and joy to your home garden.