Starting seedlings at home is one of the most rewarding and practical steps in gardening. Healthy seedlings give plants a strong start, improve survival rates, and often produce bigger harvests. Even without a dedicated greenhouse, expensive trays, or specialized equipment, you can create a DIY improvised seedbed with minimal tools and materials. This method allows gardeners of all experience levels to propagate vegetables, herbs, and flowers successfully from seed in small indoor or outdoor spaces.
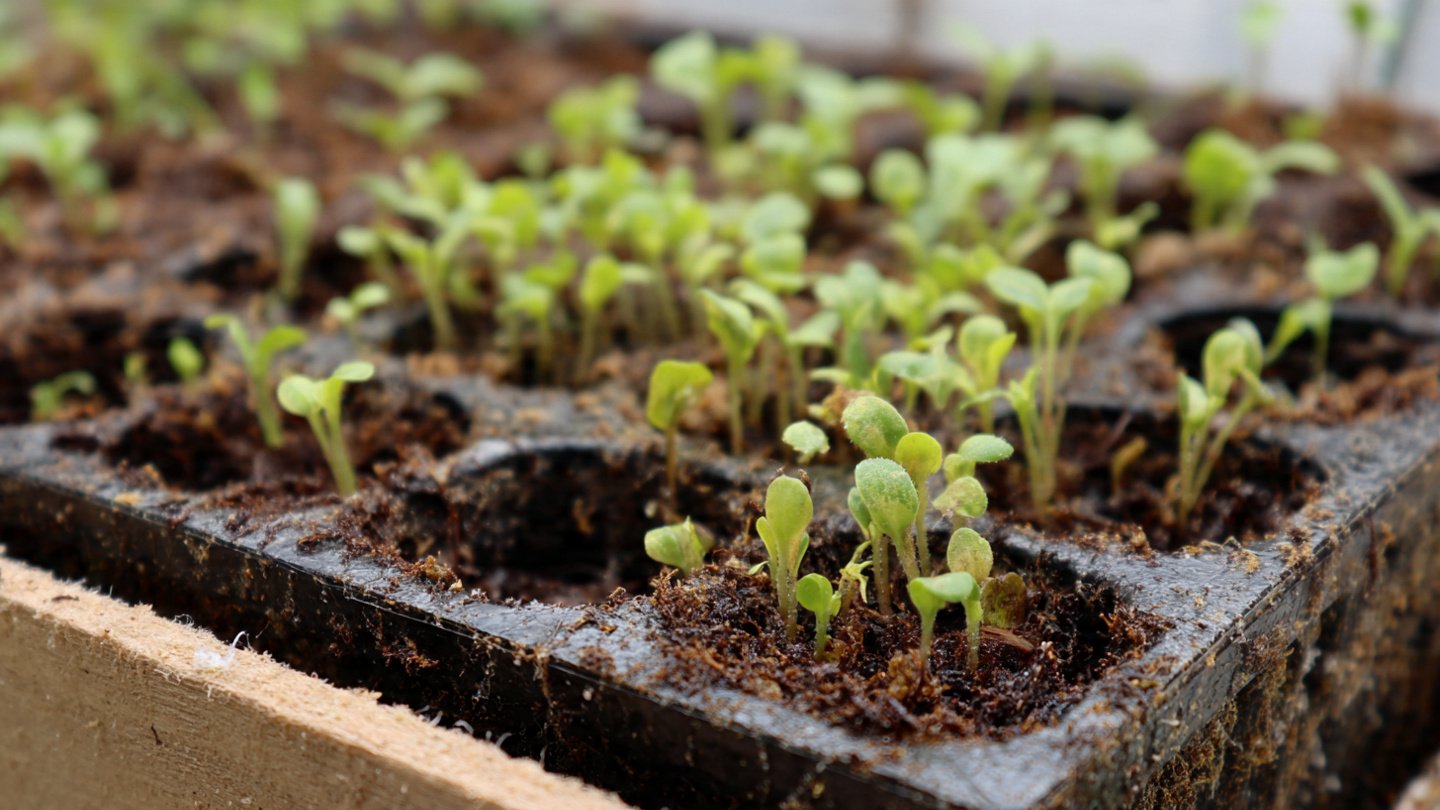
The first step in creating a DIY seedbed is selecting a suitable container. Almost anything can serve as a seed tray if it holds soil, retains moisture, and has drainage. Common household items like shallow plastic boxes, old trays, yogurt cups, egg cartons, or recycled food containers work perfectly. For larger seedlings, consider using small crates, seedling flats, or even wooden boxes. The key is to ensure that containers are clean, free of chemicals, and sturdy enough to support soil and water without collapsing.
Drainage is essential for seedling success. Seeds are extremely vulnerable to rot if water collects at the bottom of the container. If your chosen container lacks holes, you can carefully poke small drainage holes using a nail, screwdriver, or heated pin. A layer of small pebbles or coarse sand at the bottom can further improve drainage and prevent waterlogging. Proper drainage keeps roots healthy and reduces the risk of fungal problems.
The next component is the soil or growing medium. Seedlings thrive in light, well-draining, and nutrient-rich soil. Garden soil is usually too dense and may harbor pests, diseases, or weed seeds, so it is not ideal. Instead, create a simple seed-starting mix using household materials: combine equal parts of compost, coco peat, and fine sand. This mixture retains moisture while allowing roots to breathe. You can also include a small amount of well-rotted organic matter to supply nutrients during early growth. Avoid using heavy fertilizers at this stage, as young seedlings are sensitive to nutrient burn.
Once the container and soil are ready, it’s time to sow seeds. Even spacing is important to avoid overcrowding, which can stunt growth and promote disease. Follow the seed packet instructions for depth, usually one to two times the size of the seed. Tiny seeds may simply be pressed onto the surface without covering, while larger seeds should be lightly buried. Label each section of your improvised seedbed with the plant name or date using small sticks, markers, or scraps of cardboard. This prevents confusion later and helps track germination times.
Watering is a critical step that requires careful attention. Newly sown seeds need consistent moisture to germinate, but overwatering can wash away seeds or cause fungal problems. A gentle misting with a spray bottle or watering can with a fine rose is ideal. Keep the soil evenly moist but not soggy. Covering the seedbed with a thin plastic sheet, glass pane, or clear lid creates a mini-greenhouse effect, maintaining humidity and warmth that promote faster germination. Make sure to ventilate occasionally to prevent mold and ensure airflow.
Sunlight or adequate light is another important factor for seedling development. Place your improvised seedbed in a bright location that receives indirect sunlight, such as a windowsill facing south or east. Avoid direct, harsh sunlight that can scorch tender seedlings. If natural light is insufficient, use household lamps or inexpensive LED grow lights positioned a few inches above the seedlings. Seedlings that stretch or become leggy often indicate inadequate light. Adjust the light source as plants grow to maintain strong, upright stems.
Temperature also affects germination. Most vegetable seeds germinate best in warm soil, generally between 65°F and 75°F. If your home is cool, you can place the seedbed on a warm surface, such as near a radiator, on top of the refrigerator, or use a heating mat if available. Avoid exposing seedlings to drafts or sudden temperature fluctuations, which can slow germination or weaken young plants.
As seedlings emerge, thinning becomes important to ensure healthy growth. Overcrowded seedlings compete for light, water, and nutrients. Once the first true leaves appear, use small scissors or gently pinch off weaker seedlings at soil level, leaving the strongest ones. Thinning improves airflow around remaining seedlings, reducing the risk of disease and encouraging vigorous root development.
Nurturing seedlings involves regular monitoring of water, light, and space. Check soil moisture daily, especially in warmer indoor conditions where soil dries quickly. Avoid overwatering by lifting the container to feel its weight; light containers often indicate dry soil. Rotate seedbeds periodically to ensure even light exposure, which prevents seedlings from leaning toward one side. Regular observation allows early detection of pests such as aphids or fungal issues like damping-off, which can destroy seedlings quickly if not addressed.
Fertilization should begin once seedlings develop their first true leaves. Use a diluted, balanced liquid fertilizer or a weak compost tea solution to provide essential nutrients without overwhelming young roots. Feeding every one to two weeks ensures steady growth and stronger plants for transplanting. Avoid strong fertilizers or frequent application, which can burn delicate seedlings or cause unnatural, weak growth.
As seedlings grow, they may need support to remain upright. Some tender plants, such as tomatoes or peppers, benefit from small stakes or toothpicks to guide growth. Tie gently with string, thread, or soft strips of fabric. Supporting seedlings prevents bending, breakage, and root stress, ensuring they remain strong and ready for transplantation.
Hardening off is the final preparation before transplanting seedlings into garden beds or larger containers. Gradually acclimate seedlings to outdoor conditions over one to two weeks. Start by placing the seedbed outdoors for a few hours in a shaded location, gradually increasing exposure to sunlight and wind. Reduce watering slightly during this period to encourage stronger stems. Proper hardening prevents transplant shock and increases the survival rate of seedlings when moved to their permanent location.
The beauty of a DIY improvised seedbed is its adaptability. You can scale it to fit any space and use readily available materials. From repurposed containers to homemade soil mixes, this method minimizes costs while maximizing results. Seedlings grown in such controlled conditions often outperform those sown directly in the ground, particularly in urban settings or during early spring when outdoor soil may still be cold.
This method also allows gardeners to experiment with different crops, varieties, and planting schedules. You can start leafy greens, herbs, flowers, and vegetables in the same seedbed or separate containers. Controlled indoor conditions give flexibility in timing, allowing staggered sowings for a continuous supply of plants. Experimenting with different soil compositions, lighting setups, and watering routines helps refine the process and improves long-term gardening success.
Finally, starting seedlings at home promotes self-sufficiency and sustainability. Instead of relying on store-bought seedlings or transplants, you can propagate your own, reducing costs and ensuring healthy, disease-free plants. Seedlings grown in a DIY seedbed are often hardier, better adapted to local conditions, and more productive in the long run.
In conclusion, a DIY improvised seedbed is an accessible, effective, and inexpensive way to start healthy seedlings at home. By selecting appropriate containers, preparing loose well-draining soil, sowing seeds carefully, providing consistent moisture, light, and warmth, and practicing proper care, gardeners can achieve strong, vigorous seedlings ready for transplanting. Minimal tools and household materials are all that’s needed to create a thriving seedbed. With patience, attention, and regular monitoring, this simple method allows anyone to grow robust seedlings, maximize survival rates, and enjoy a successful gardening experience from the very beginning of the plant’s life cycle.
Seed starting at home, even with minimal tools, empowers gardeners, encourages experimentation, and ensures that the plants you eventually transplant are healthy, productive, and well-established. From vegetables to flowers, herbs to decorative plants, the DIY improvised seedbed method opens the door to successful propagation, sustainable gardening practices, and the joy of growing plants from seed to harvest.