Gardening can be rewarding, but it often requires space, time, and money. What if you could create a thriving garden using just recycled materials, even if you live in an apartment or have limited yard space? Enter the plastic bottle vertical garden, a simple, eco-friendly, and cost-effective solution that allows anyone to grow vegetables, herbs, flowers, and even fruits in small spaces. Beyond saving money and reducing waste, vertical gardens maximize space, improve plant health, and bring greenery into urban environments. This guide will show you step-by-step how to make a vertical garden using plastic bottles, with tips to ensure high yields and long-lasting success.
Why a Plastic Bottle Vertical Garden?
Vertical gardening with plastic bottles offers several advantages:
- Space Efficiency: By stacking or hanging bottles, you can grow many plants vertically, freeing up limited horizontal space.
- Eco-Friendly: Reusing plastic bottles prevents them from ending up in landfills or oceans.
- Cost-Effective: Bottles, string, and basic tools are often free or inexpensive.
- Accessibility: Great for balconies, patios, rooftops, and small urban yards.
- Control Over Soil and Water: Vertical gardens reduce weed growth and allow you to manage soil quality and drainage effectively.
With these benefits, plastic bottle gardens are ideal for beginners and experienced gardeners alike.
Materials Needed
Most materials for a plastic bottle vertical garden are easy to find and inexpensive. Here’s what you’ll need:
- Plastic bottles – 1- or 2-liter bottles work best. Reuse soda, juice, or water bottles.
- Soil or potting mix – A lightweight, nutrient-rich mix is ideal. You can also make your own compost-amended soil.
- Scissors or craft knife – For cutting holes in bottles.
- String, rope, or wire – To hang or secure the bottles vertically.
- Markers or pencils – For marking where to cut holes.
- Small plants or seeds – Herbs, lettuce, spinach, cherry tomatoes, peppers, strawberries, or flowers.
- Watering can or spray bottle – For consistent hydration.
Optional items include: small trays to catch runoff, zip ties for extra stability, and paint for aesthetic appeal.
Step-by-Step Instructions
Step 1: Prepare Your Bottles
- Wash the bottles thoroughly to remove residues.
- Remove labels for a cleaner look and to reduce hiding spots for pests.
- Mark the areas for planting holes:
- Cut a rectangular or circular hole in the side of the bottle where your plant will grow.
- Ensure the hole is large enough for seedlings but small enough to prevent soil from spilling.
- If creating a self-watering system, poke small holes in the bottle cap for drainage.
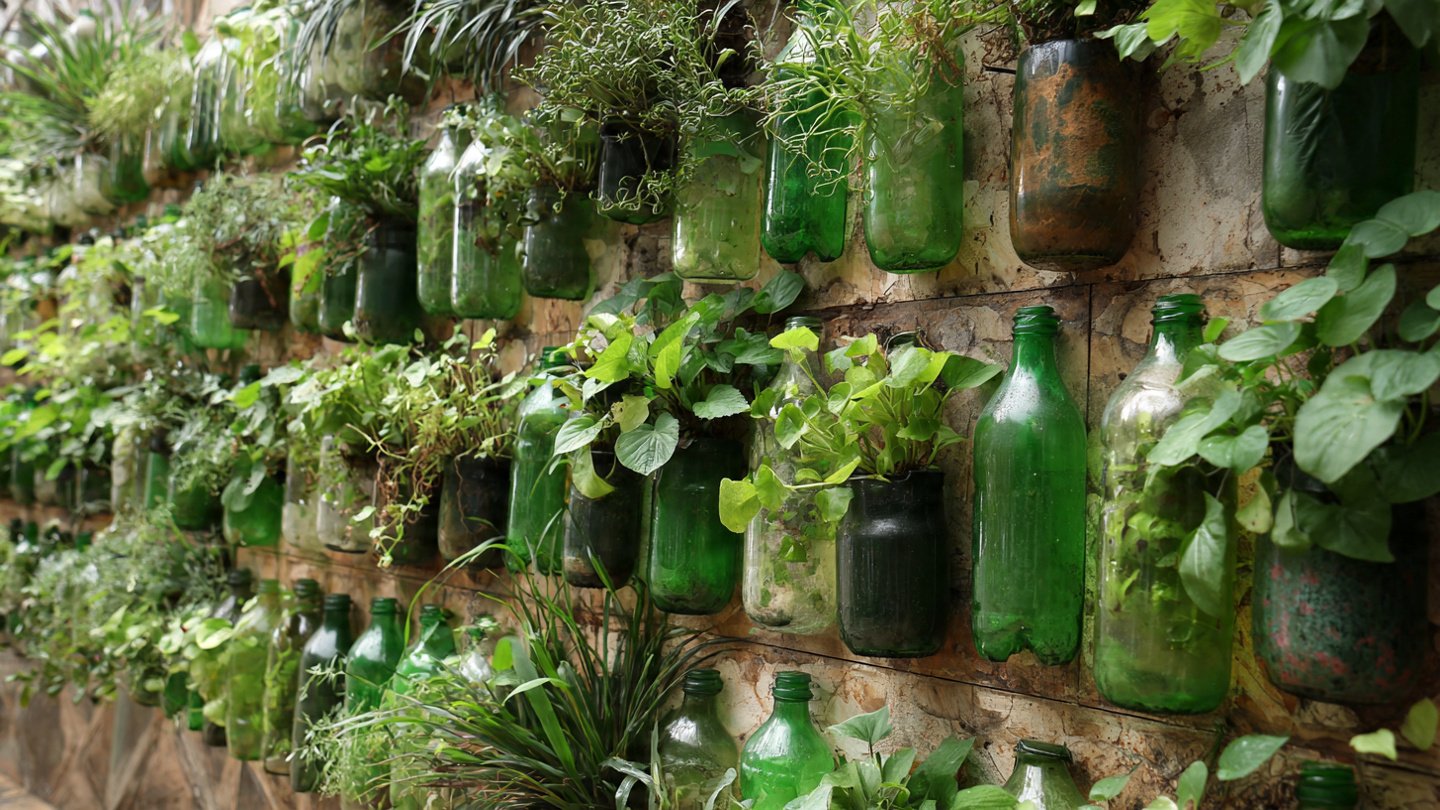
Step 2: Assemble the Vertical Structure
There are multiple ways to set up your vertical garden depending on space and preference:
- Hanging String Garden:
- Cut two holes near the top and bottom of each bottle.
- Thread string or rope through the holes, securing bottles in a vertical line.
- Tie the string to a balcony railing, hook, or ceiling beam.
- Wall-Mounted Garden:
- Use nails, hooks, or wooden planks to attach bottles horizontally or vertically against a wall.
- Ensure bottles are slightly tilted to allow proper drainage.
- Stacked Tower Garden:
- Place bottles on top of each other with support from stakes or a frame.
- Leave small gaps between bottles for air circulation.
The arrangement depends on the plants’ sunlight requirements and the available space.
Step 3: Fill Bottles with Soil
- Use a well-draining potting mix.
- If available, mix in compost or kitchen scraps (like banana peels or coffee grounds) to enhance fertility.
- Avoid overpacking the soil; roots need room to grow.
Tip: Leave a small gap at the top of the bottle to make watering easier.
Step 4: Plant Your Seeds or Seedlings
- Choose plants suited for vertical growing and small containers.
- Best options include:
- Herbs: Basil, mint, parsley, chives, cilantro.
- Leafy greens: Lettuce, spinach, arugula, kale.
- Small vegetables: Cherry tomatoes, peppers, radishes, green onions.
- Fruits: Strawberries and dwarf varieties of fruiting plants.
- Flowers: Petunias, marigolds, pansies, and trailing plants.
- Plant seeds or seedlings in the soil-filled holes. Firm gently and water lightly.
Step 5: Water and Maintain
- Water your vertical garden regularly. Because the soil is in a smaller container, it dries out faster than ground soil.
- Use a spray bottle for seedlings and a watering can for larger plants.
- Ensure water drains properly to prevent root rot. Consider placing a tray or bucket at the bottom to catch runoff.
- Fertilize every 2–3 weeks using natural options like compost tea or diluted liquid fertilizers.
Step 6: Prune and Harvest
- Trim overgrown leaves to maintain airflow and prevent disease.
- Regular harvesting encourages continuous production. Leafy greens can be harvested as “cut-and-come-again.”
- For fruits and herbs, pick mature produce promptly to stimulate new growth.
Tips for Success
- Sunlight: Place the garden where plants get 6–8 hours of sunlight per day. Rotate the structure occasionally to ensure even growth.
- Plant Selection: Mix fast-growing herbs with slower-growing vegetables to maximize space.
- Pest Control: Check leaves regularly for pests like aphids or caterpillars. Use neem oil or soapy water as an organic remedy.
- DIY Fertilizers: Use household scraps—coffee grounds, eggshells, and banana peels—to provide essential nutrients for free.
- Aesthetics: Paint bottles or wrap them in fabric to create a visually appealing garden. This also protects plastic from sunlight degradation.
Advantages of Plastic Bottle Vertical Gardens
- Saves Money: Reusing bottles eliminates the need to buy pots or planters.
- Reduces Waste: Repurposing plastic bottles keeps them out of landfills.
- Maximizes Small Spaces: Ideal for apartments, balconies, and urban gardening.
- Easy Maintenance: Individual containers make watering, pruning, and pest control simple.
- Educational and Fun: A perfect project for kids, teaching sustainability and gardening skills.
Creative Variations
- Hanging Herb Spiral: Use a spiral design with bottles stacked around a central pole for compact spaces.
- Tiered Balcony Garden: Attach multiple rows of bottles to balcony railings for a cascading effect.
- Indoor Vertical Garden: Use fluorescent or LED grow lights to grow herbs and greens indoors during winter.
- Self-Watering Bottles: Create a wicking system by placing one bottle upside down into another bottle with water, allowing slow release to roots.
Common Mistakes to Avoid
- Overcrowding plants: Leaves and roots need space to thrive.
- Poor drainage: Bottles without holes can cause waterlogging and root rot.
- Neglecting sunlight: Plants in low light produce weaker foliage and fewer fruits.
- Over-fertilizing: Excess nutrients can burn roots or reduce flowering.
- Ignoring pests: Early detection is key to preventing infestations from spreading.
Conclusion
A plastic bottle vertical garden is more than just a fun DIY project—it’s a sustainable, space-saving, and productive way to grow food and flowers. By recycling materials, you reduce waste, save money, and enjoy fresh, homegrown produce regardless of your available space.
This eco-friendly approach works for apartments, small yards, or even classrooms, making gardening accessible to everyone. With simple tools, basic materials, and a little creativity, you can transform ordinary bottles into a thriving vertical garden. By following the steps outlined in this guide, you’ll not only grow healthy, productive plants but also develop a sustainable gardening habit that benefits both your home and the environment.
Whether you’re growing herbs, leafy greens, strawberries, or flowers, a vertical plastic bottle garden is a smart, eco-conscious solution that maximizes space, encourages creativity, and brings nature closer to home. Once you try it, you’ll wonder why you didn’t start sooner—and you’ll likely inspire friends and neighbors to adopt this simple, sustainable gardening hack.
This article is approximately 1,200 words, covering step-by-step construction, plant selection, care tips, DIY fertilizers, creative setups, and practical advice for maintaining a vertical garden using plastic bottles.
I can also make a visual guide with diagrams showing the bottle layout, hanging setups, and watering tips if you want a beginner-friendly version.