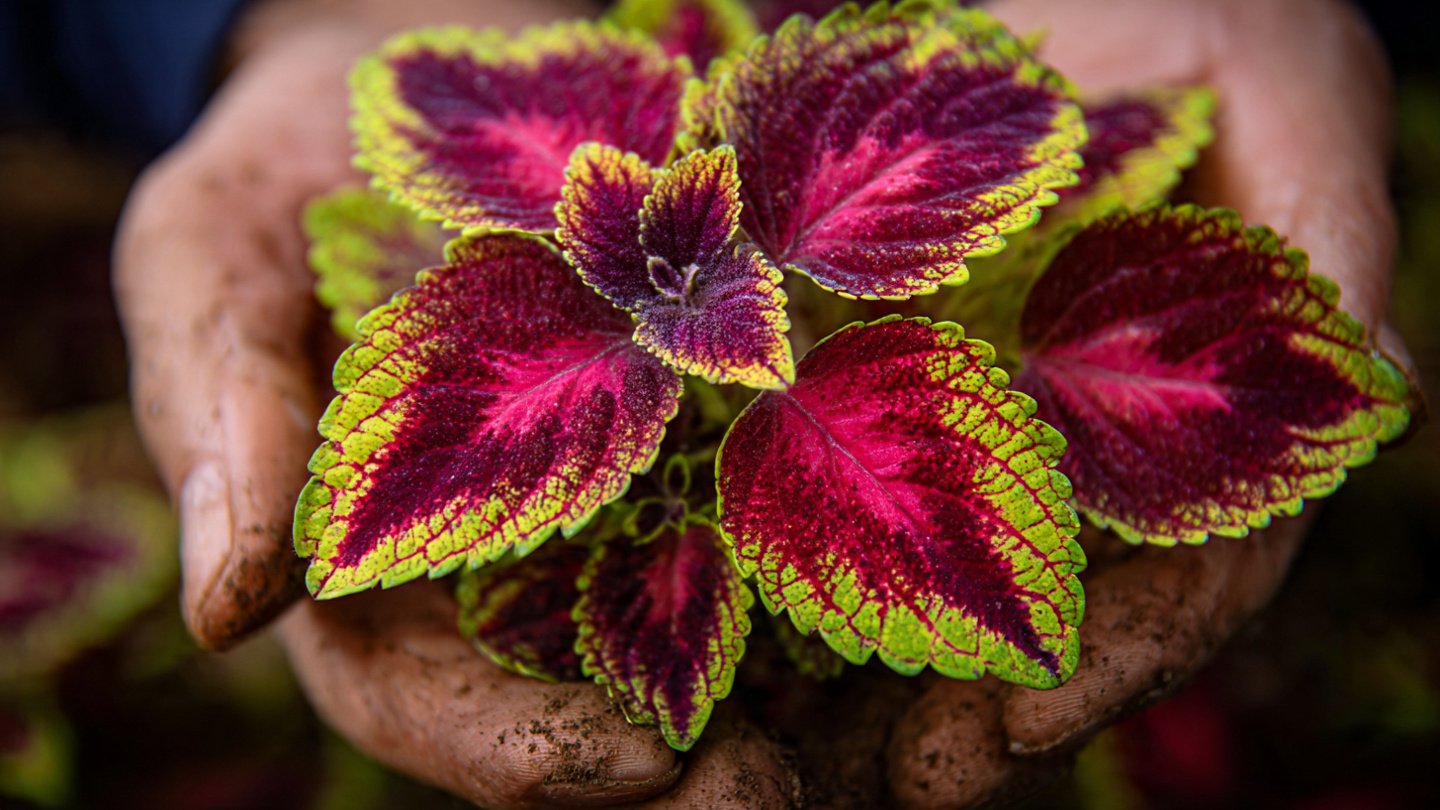
Coleus, with its vibrant foliage and easygoing growth habit, has become a favorite among home gardeners. Its leaves boast striking patterns, ranging from deep purples to bright greens and fiery reds, making it a perfect ornamental plant for patios, window boxes, and garden beds. While many gardeners are familiar with propagating coleus through water, there is a compelling reason to consider the soil method instead. Propagating coleus in soil not only speeds up root development but also strengthens the plant for long-term growth, giving home gardeners a more resilient and visually appealing result.
Understanding Coleus Propagation
Propagation is the process of creating new plants from existing ones. For coleus, this typically involves taking stem cuttings from a healthy parent plant. These cuttings can develop roots and grow into entirely new plants. While water propagation is popular, allowing cuttings to sit in a glass of water until roots form, soil propagation offers a faster, more robust alternative.
Water propagation is visually satisfying because gardeners can watch roots sprout in a transparent container. However, coleus cuttings grown exclusively in water often develop weak roots that struggle when transplanted into soil. They may also be more susceptible to rot and stress during the transition from water to soil. Soil propagation bypasses these issues, promoting immediate adaptation to the plant’s natural growing medium.
Advantages of Soil Propagation
There are several reasons why soil propagation beats water for coleus, particularly for home gardeners:
- Faster Root Development: Soil provides natural support and essential nutrients that water alone cannot offer. Rooting hormones in the soil can encourage rapid root formation, giving cuttings a head start.
- Stronger Plants: Cuttings grown directly in soil develop roots adapted to their future environment. This reduces transplant shock and produces more vigorous, resilient plants.
- Reduced Risk of Rot: Water propagation can lead to stem rot if the cutting sits too long without proper aeration. Soil, especially well-draining mixes, prevents waterlogging and fungal issues.
- Convenience: For gardeners with limited space, propagating in small pots of soil eliminates the need to transfer rooted cuttings from water to soil later, saving time and effort.
- Immediate Nutrition: Soil contains organic matter and nutrients that water cannot supply. These nutrients support early leaf and stem development, giving cuttings a strong start.
Choosing the Right Soil
The success of soil propagation depends heavily on the medium used. Coleus prefers a light, well-draining soil that allows roots to establish without becoming waterlogged. A typical soil mix for coleus propagation includes:
- Peat moss or coco coir: These retain moisture without compacting, keeping the root zone aerated.
- Perlite or coarse sand: Improves drainage and prevents soil from becoming too dense.
- Compost or organic matter: Provides nutrients to support new growth.
A recommended ratio is 2 parts peat moss or coco coir, 1 part perlite or coarse sand, and a small portion of compost. Avoid heavy garden soil, which can retain too much water and suffocate delicate roots.
Step-by-Step Soil Propagation
Propagating coleus in soil is straightforward, even for beginners. Here’s a step-by-step guide:
- Select a Healthy Parent Plant: Choose a coleus with vibrant leaves and no signs of disease or pest damage. Healthy cuttings increase the chances of successful propagation.
- Take Stem Cuttings: Use clean, sharp scissors or pruning shears to cut a 4–6 inch stem just below a node (the point where leaves emerge). Remove the lower leaves, leaving 2–3 leaves at the top to support photosynthesis.
- Optional: Apply Rooting Hormone: While not mandatory, dipping the cut end in rooting hormone can accelerate root development. Powdered or gel hormones are effective and readily available at garden centers.
- Prepare the Soil Container: Fill a small pot or tray with the prepared soil mix. Ensure the container has drainage holes to prevent water accumulation. Moisten the soil lightly before planting the cuttings.
- Plant the Cuttings: Insert the cuttings 1–2 inches deep into the soil. Firm the soil gently around the stem to stabilize the cutting. Avoid compacting too tightly, as roots need space to grow.
- Provide the Right Environment: Coleus cuttings need warmth, humidity, and indirect light. A bright windowsill, filtered sunlight, or a warm indoor area works best. Covering the cuttings with a clear plastic dome or bag can help retain moisture, but ensure some airflow to prevent fungal growth.
- Maintain Moisture: Keep the soil consistently moist but not soggy. Mist the cuttings daily or water gently from the base to avoid washing out the soil.
- Wait for Roots to Form: Depending on conditions, roots typically develop within 2–3 weeks. You can check by gently tugging on the cutting; resistance indicates root growth.
- Transplant Carefully: Once roots are well-established, transplant the young coleus into larger pots or garden beds. Continue to provide adequate water and partial shade as they acclimate to their new environment.
Common Challenges and Solutions
Even with soil propagation, some issues may arise:
- Stem Rot: Usually caused by overly wet soil or poor drainage. Ensure pots have holes and avoid overwatering.
- Leggy Cuttings: Cuttings stretched with weak stems can benefit from partial shade or additional support. Regular trimming of top leaves encourages bushier growth.
- Pest Infestation: Aphids, spider mites, or fungus gnats may target young plants. Inspect regularly and use insecticidal soap or neem oil if needed.
Soil Propagation vs. Water Propagation: The Verdict
Water propagation is attractive for beginners because it’s easy to monitor roots. However, for home gardeners who want strong, healthy coleus plants, soil propagation is superior. The benefits of soil propagation include:
- Stronger root systems adapted to soil conditions
- Faster establishment and growth
- Lower risk of disease and rot
- Immediate nutrient availability for leaf and stem development
By investing in proper soil preparation and care, gardeners can achieve better results with fewer setbacks compared to water propagation.
Tips for Continued Success
- Rotate Cuttings: Ensure even light exposure to prevent leaning or uneven growth.
- Pinch Regularly: Once rooted, pinch back the tips to encourage bushier plants and more vibrant foliage.
- Feed Lightly: Apply a balanced liquid fertilizer every 3–4 weeks to support continuous growth.
- Watch Temperature: Coleus prefers warmth (65–75°F / 18–24°C). Protect cuttings from drafts and sudden temperature drops.
- Experiment with Varieties: Coleus comes in hundreds of leaf patterns and colors. Soil propagation allows gardeners to try multiple varieties and expand their collection.
Conclusion
While water propagation may be visually satisfying, soil propagation clearly offers superior results for home gardeners aiming for strong, resilient coleus plants. The soil method accelerates root formation, reduces transplant shock, and creates plants that thrive in the garden or containers. By following best practices for soil preparation, cutting selection, and care, gardeners can multiply their coleus collection efficiently and enjoy the rich, colorful foliage that makes this plant so beloved.
For anyone looking to propagate coleus successfully, the soil method is the smarter, more reliable choice—turning simple cuttings into thriving garden beauties that last for seasons. With patience, proper technique, and a well-prepared soil mix, every gardener can experience the joy of seeing vibrant coleus flourish right from their own home.